Traditional wet flies are coming back to the fly fishing. In the shadows of nymphs and emergers for a while, this kind of flies that served well for years is today studied again by the finest anglers that find unique solutions in their particular designs. Wets have been adapted through history to fi View more...Traditional wet flies are coming back to the fly fishing. In the shadows of nymphs and emergers for a while, this kind of flies that served well for years is today studied again by the finest anglers that find unique solutions in their particular designs. Wets have been adapted through history to fish different types of waters and ways of fishing them. The Clyde and Tummel kind, with delicate bodies and fine almost vertical wings show the degree of purity these flies had reached in Scotland.
Few anglers dare to use today wets like these or Stewart spiders upstream, because they feel good with their Woolly Buggers, but I can assure you that a well used wet are an incredible tool for an angler.
Today I bring a personal model with a different modern style, long tail and short fine wings. It has characteristics of many traditional wets, including low water flies. It can resemble a small minnow, a scud, an emerger, a sunken adult mayfly, a diving adult caddis, an emerging pupa or simply a good bite.
Copper and the red pheasant make a reddish aura in the water that really attracts trout, the other materials give it a delicate ethereal effect. I think wets disappeared because commercial tiers did not tie them well, so these bulky flies were not good in the water. Fortunately, sensitive tiers everywhere are rescuing these flies and today they regained the place they deserve in our fly boxes.
Move the mouse over the image to zoom in the fly.
Touch the image to zoom in the fly.

List of materials
Materials Hook: Mustad 5124 or 3906B like the Daiichi 1560 or similar.Thread: 8/0, cream or white.Tail: pheasant crest, golden but dyed of Crimson Red.Body: flat tinsel, medium size, copper.Body Hackle: Whiting hen feather, long and fine, furnace or reddish brown.Hackle: grouse feather.Wing: spotted turkey wing sections, rooster wing or pheasant tail (female).Head: thread, painted black or brown. View more...Materials Hook: Mustad 5124 or 3906B like the Daiichi 1560 or similar.Thread: 8/0, cream or white.Tail: pheasant crest, golden but dyed of Crimson Red.Body: flat tinsel, medium size, copper.Body Hackle: Whiting hen feather, long and fine, furnace or reddish brown.Hackle: grouse feather.Wing: spotted turkey wing sections, rooster wing or pheasant tail (female).Head: thread, painted black or brown.
Steps
Step 1
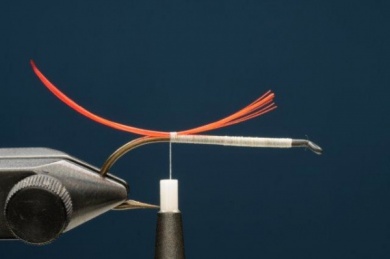
Straighten the hook eye. It makes it more elegant and the fly works better. Cover the hook with thread towards the bend, where we tie a pheasant crest, straight. Continue threading until the point we see in the picture.
Step 2
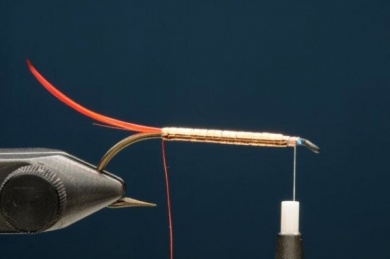
Take some copper wire, medium width; flatten it for half a centimeter long. Tie the copper wire in its flat section so it makes a neat cylinder body. Tie towards the front evenly.Tie the copper tinsel (first cut a V-shape on its tipso it does not bulk up unnecessarily where we tie). Go evenly towards the back,turns should be independent from each other, not on top. Then, go back to thefront. This way the tinsel turns block each other and remain firm. This is whata good tier does. View more...Take some copper wire, medium width; flatten it for half a centimeter long. Tie the copper wire in its flat section so it makes a neat cylinder body. Tie towards the front evenly.Tie the copper tinsel (first cut a V-shape on its tipso it does not bulk up unnecessarily where we tie). Go evenly towards the back,turns should be independent from each other, not on top. Then, go back to thefront. This way the tinsel turns block each other and remain firm. This is whata good tier does.
Step 3
Take a long hen feather with short fibers, these should not be longer than the hook gap. We can only find these in genetic hens like Whiting’s, if not we can use a very soft rooster feather, sometimes found in low quality rooster feathers.
Step 4
We can see how the wire works and how the feather was wrapped. The feather goes in opposite direction of the wire, making a strong tie. The length of the hen fibers should be half the hook gap, to make a fine realistic abdomen. This feather adds transparency and movement illusions allowing the silhouette to be seen.
Step 5
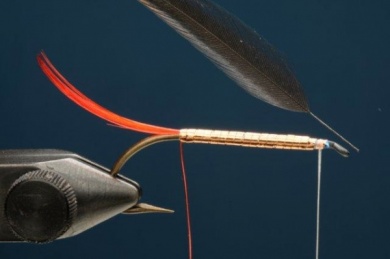
Tear the fibers out with some tweezers in the upper part of the fly. Tear them in the opposite direction of its natural inclination. This leaves the abdomen totally clean.Take a grouse feather, finely barred. Its fibersshould be 1 ½ times longer than the hen feathers used for the body. Open thefeather and tie it by its thinner tip, with its best color on the top.
Step 6
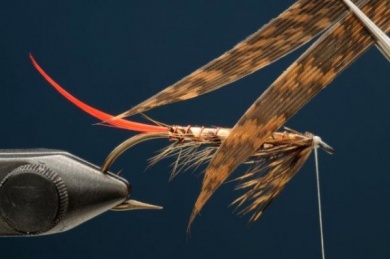
Separate two turkey sections, one from the right and the other from the left. It’s better if the pair of wings is symmetrical.
Take the grouse hackle fibers out carefully. Use the thread to make a base layer and then tie the turkey sections. First put together the concave parts of the turkey sections, tie softly without pressing the feather first, then pull the thread upwards so that the fibers get pressed together in the same spot. The picture shows this.
View more...Separate two turkey sections, one from the right and the other from the left. It’s better if the pair of wings is symmetrical.
Take the grouse hackle fibers out carefully. Use the thread to make a base layer and then tie the turkey sections. First put together the concave parts of the turkey sections, tie softly without pressing the feather first, then pull the thread upwards so that the fibers get pressed together in the same spot. The picture shows this.
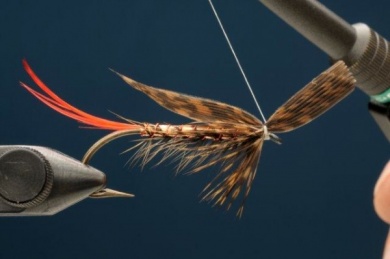
Step 7
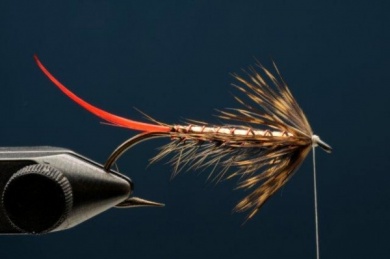
Finish with a short conic head, tie and paint with black marker before adding lacquer. I use varnish or synthetic enamel because, although it’s slower to dry, it doesn’t whiten with time.
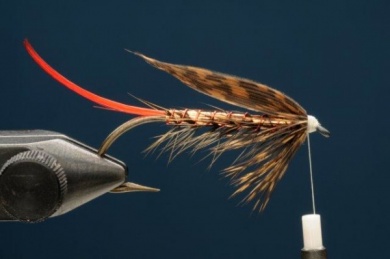
Step 8
The Copper Illusion is now finished.