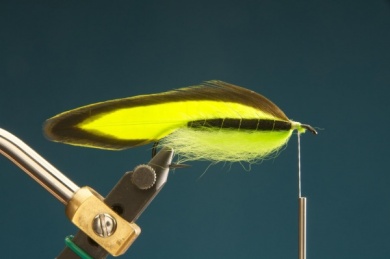
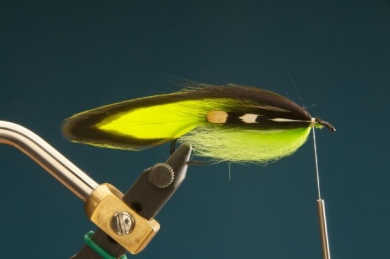
I never liked that much the Matukas made with hen feathers, maybe because these feathers wrinkle in the boxes and lose its shape a bit, something that is terrible for a perfectionist person. Still, once at Patagonia, Laura-my wife- literally beat me using a green hen Matuka. From that moment on, I w View more...I never liked that much the Matukas made with hen feathers, maybe because these feathers wrinkle in the boxes and lose its shape a bit, something that is terrible for a perfectionist person. Still, once at Patagonia, Laura-my wife- literally beat me using a green hen Matuka. From that moment on, I went back to the bases and the original Matukas from New Zealand, made with soft heron feathers (today forbidden), trying to make something effective and elegant without depending on rooster feathers and making use of the hens’ that are soft as the ones on heron and come in interesting colors. Using some fox hair one can achieve some side volume in a fly that usually is flat. Then the Matuka pushes more water and fish can detect it easily.I tie some with tridimensional eyes and others I do with jungle cock. The dyed Guinea hen collar is very interesting for it adds vibrations due its conic fibers feathers, making a great style for these Matukas; and that is why I chose a similar one to the one used in old Dee type salmon flies.In the first picture we can see several variants of the F & H Matuka, in which I have used different hens and collars, some with dubbing body in three colors.
Move the mouse over the image to zoom in the fly.
Touch the image to zoom in the fly.

List of materials
Tying materialsHook: Daiichi 2271 hook DEE size 2 to 8.Thread: 8/0 white cream.Listed: chartreuse gold wire.Body: dubbing.Wing: two dyed Sussex chicken feathers.Belly: chartreuse fox hair.Sides: fox hair black.Cheeks: jungle cock.Collar: Guinea fowl chartreuse.
Steps
Step 1
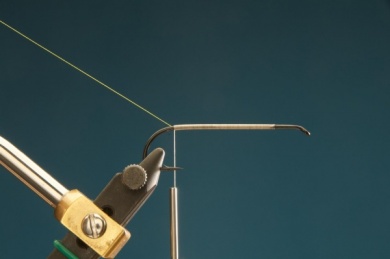
Tie the wire with even thread turns on the same side as the hook eye loop. Do it up to where the picture shows, just before the barb.
Step 2
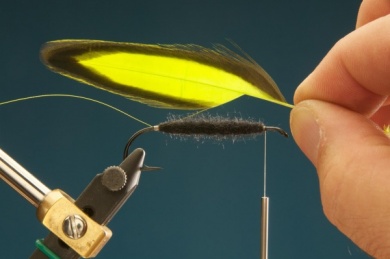
Take the thread back to the front and make an oval body with dubbing, tying from the eye to the back and going again to the front. With a wire brush, take the remnants from the body to make a translucent halo.
Step 3
Choose to hen feathers, set them together perfectly and take the remnants of the fibers away at the lower part.
Step 4
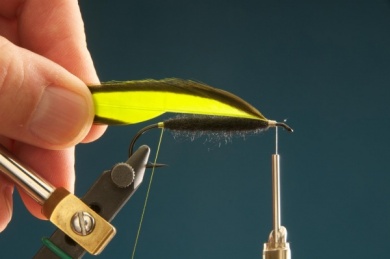
Tie the feather firmly at the front, it should be vertical. Very carefully trim the lower part of the fibers to get to the end of the body.
Step 5
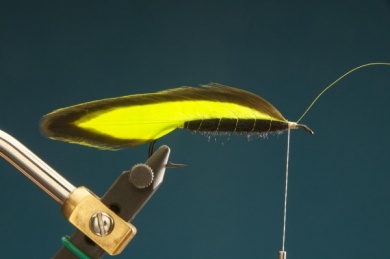
Make a turn with the wire to shape a tag. The, separating the wing fibers with a needle, spiral the wire towards the eye, making bigger spaces where the body is thicker, so that the listing is nice and harmonic. When you get to the front, tie the wire and trim.
Step 6
Prepare a fox tail strap eliminating the hard hair and tie it in the belly of the fly, making sure it is not too much hair.
Step 7
Tie a bundle of fox hair at each side, we should use half of what was used for the belly.
Step 8
Add the jungle cock cheeks, or the collar directly if we are to use adhesive eyes.
Step 9
Choose a dyed Guinea hen feather with fibers of half the hook length and make a collar tying it by the tip and wrapping, as we comb the fibers to the back; then paint it black and apply several layers of our favorite epoxy or lacquer.
Step 10
Finished fly image.

