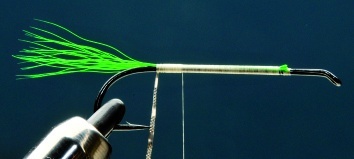
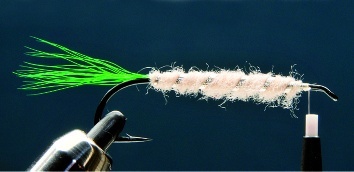
Step 1
Choose a hook that goes well with the elegance ofthe fly. Daichii 2271, a hook for salmon streamers and Dee style flies isperfect. Carefully select a shiny green bundle of bucktail and even it out. It´skey to choose deer tails with hair of the same length. The hair must be softlyfrizzed and be straight at the same time, with good tips. Uneven hair with finetwisted tips is impossible to even out.Once we even the green hair bundle, tie it withturns of white thread from the front to the bend of th View more...

Step 2
Go back to the front with the white thread. Tie the flat tinsel on the lower side of the body. If the tinsel is finer it will be better, you can cut it diagonally to use it. Tie the fine tip first and you will get an elegant ribbing.
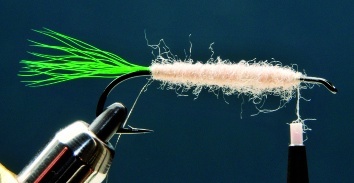
Step 3
Use some dubbing to make an underbody in the center section of the body. Always use a lighter thread color so the dubbing color does not vary when wet, here black thread can ruin our fly.
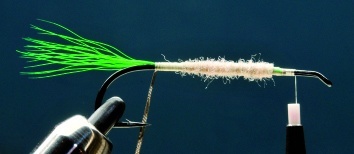
Step 4
Place some more dubbing, go to the back and then to the front shaping an even body.
Step 5
Time to place the tinsel. Pay attention to the number of turns and the inclination so the result is pleasant to the eyes. Generally, 5 or 6 turns with a 45° inclination is correct. Separate the turns a bit more where the fly gets thicker, it has a good visual effect.
Step 6
In the same way that we made the tail, even out a White bucktail bundle and tie it so it reaches the tips of the tail. Do not use too much hair, for 3 more bundles go over the white one. We do not want to ruin the head, the silhouette and the fly´s grace in the water.
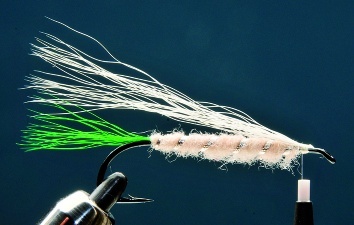
Step 7
Carefully, place a pink bucktail over the white one, then a green one, and then the grey squirrel back (the middle section of the tail has better hair).Make a conic shape by trimming the hair. Each hair should be shorter than the previous one. Some tiers use the two middle hairs shorter and other variants. After tying the wing, add an even short pink bundle to resemble a throat or barb.

Step 8
Use the black thread and tie the two Jungle Cocks (or similar materials), finishing a short conic head that goes well with the thickness of the fly. Cement with some cyanoacrilate to make the head last longer and then varnish with our favorite lacquer.

Step 9
Finished fly.