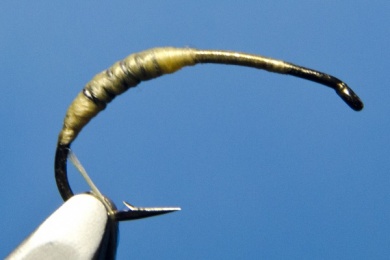
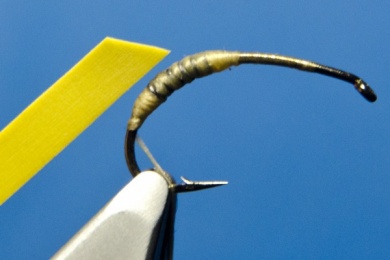
Paso 1
The weight is applied in the position shown. It is an unusual place to add weight but it helps with forming the fat abdomen.

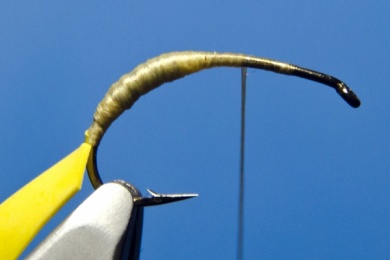
Paso 2
Start the thread and run down the hook shank, over the wire in open turns to the back of the weight. Once there build a ramp of thread to smooth the weight. (Always build this ramp first, if you try to build the one the other side of the wire you will end up pushing the wire along the hook shank).

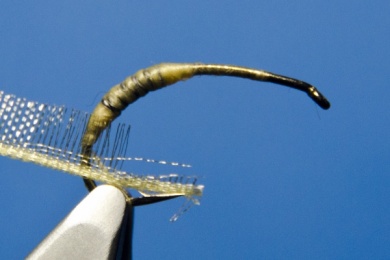
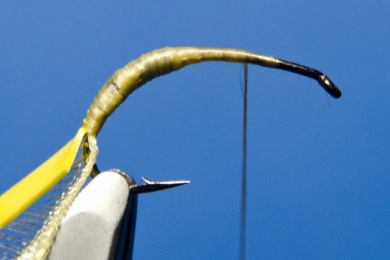
Paso 3
Then back over the wire to build the front ramp.
Paso 4
Once you have your strip make a cut from one end hard against the salve edge for about ¼ “ (6mm).

Paso 5
This cut will serve two purposes. It gives you “handles” to use to strip the weft from the wharf, and provides a section to use to tie in the rib. Grip the two sides of the cut you just made and gently pull them apart.
Paso 6
Lay that aside and prepare your nymph skin. The Nymph Skin is easy to prepare. Simply make one cut across the end of it at an angle of about 20?.
Paso 7
Tie this in by the point you just created.
Paso 8
Then add the ribbon by the tag end you created previously.
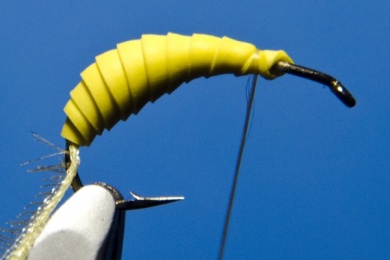
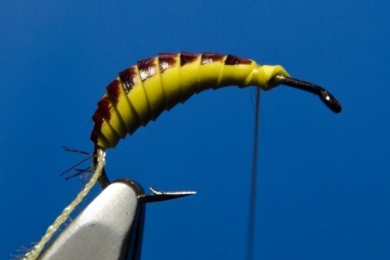
Paso 9
Take the thread forward to where you want the thorax to begin. Then follow it with the Nymph Skin. Hold the Nymph skin under slight tension. After the first turn relax this tension for the next couple of turns. After that steadily increase the tension as you wind forward. You should end up with an abdomen like this. Tie off with a couple of turns and trim out the excess.
Paso 10
Before you wind the rib a nice touch is to run a marker pen down the back. Work from the eye to the tail when doing this. Don’t go the other way or the ink will run around the edge of the nymph skin and you’ll end up with a mess.
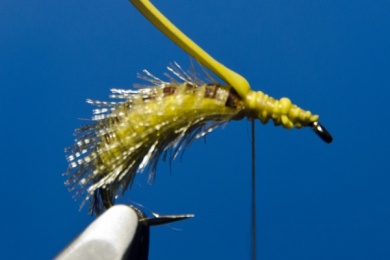
Paso 11
Next wind the rib, following the “steps” in the Nymph Skin abdomen. When you reach the thread tie this off and trim out the excess.

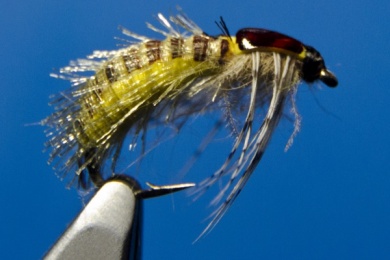
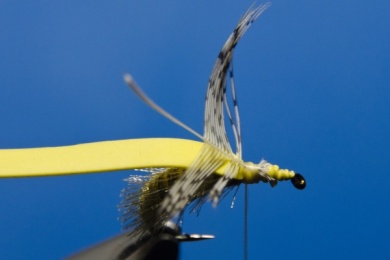
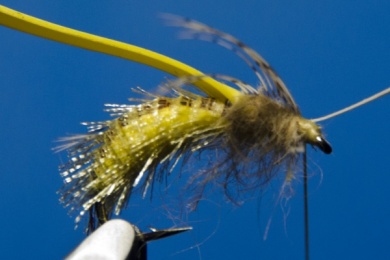
Paso 12
Now is when you can add any “extras” you feel are essential. I’ll just finish with my normal thorax and legs. If you want wing buds and antennae etc.. you can pit them in Tie in a thorax cover. You’ll have Nymph Skin handy so why not use that.
Paso 13
Prepare a partridge hackle by stripping the soft fibres off and separating out the tip. Tie it in by the tip. It doesn't have to be partridge, any game bird hackle will do.
Paso 14
Dub the thorax. Any light soft dubbing you have.
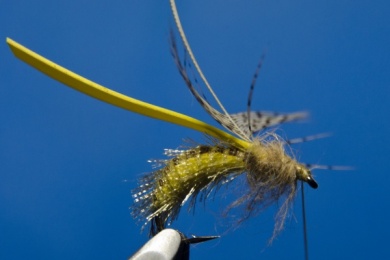
Paso 15
Pull the feather forward and tie down behind the eye.
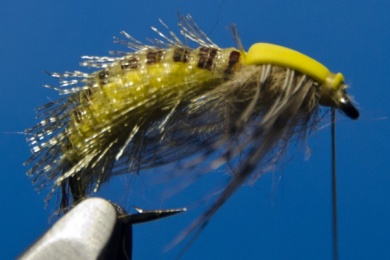
Paso 16
Follow that with the Nymph Skin thorax cover. Trim out the excess.
Paso 17
I like to colour the head nice and dark. To do this after forming the head isn’t easy. There is an easy way though. Before forming your whip finish colour the thread with the marker pen you used for the back. Then use the coloured thread to make the whip finish.
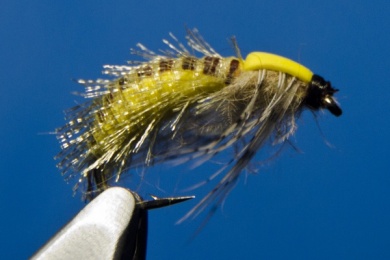
Paso 18
If you like you can colour the thorax cover with your marker pen.