
Step 1
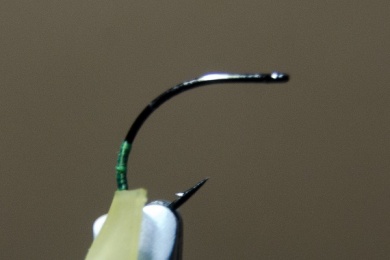
Start the hot spot thread well round the bend where you want the hot spot. Run the thread in touching turns to where you want the abdomen to finish. Prep the Nymph skin by cutting across it at a very shallow angle. Use the hot spot thread to catch in the point you have made. Leave both the thread and the nymph skin at that point.
Step 2
Start the main thread behind the hook eye and run down to the position where you want the wing to be. Do not make the wing too close to the eye. That would upset the balance of the fly on the water.

Step 3
Tie in the wing across the hook shank with cross wraps. Twist the wing around the hook shank, so it is below the shank. Lift both sides and make several turns of thread around the base of the wing.

Step 4
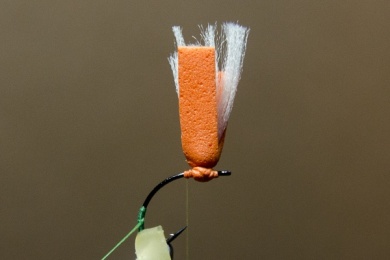
Cut a strip of foam from a sheet about 3 to 4 mm wide. Fold it under the wing, and secure with wraps of thread around the wing root. Tie down in front and behind the wing. Do not worry about crushing the foam. It is not here to add buoyancy, but to “blade” the wing.
Step 5
Run the main thread down to the hot spot thread catching in the loose end of the thread. Once the hot spot thread is secure run the thread back to the start of the bend as shown. Trim out your hot spot thread.

Step 6
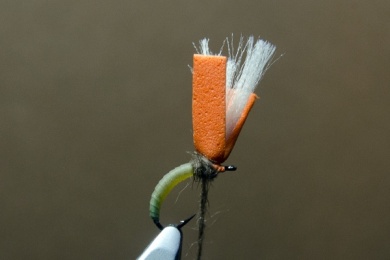
Wind the nymph skin up to where the thread is hanging. Start winding under a lot of tension and ease the tension off as you wind for a tapered body. If you want a more distinctive caddis shaped body, let the initial tension off quickly as you wind. Then apply the tension again from about the half way point. Tie off securely and remove the excess.

Step 7
Dub the thorax behind the wing. In one open turn take the dubbed thread to the eye, then wind the dubbed thread back to the wing post.
Step 8
Make sure you cover all the foam at the base of the wing. Finish with the thread at the back of the wing.

Step 9
Set a mix of CdC and partridge hackle fibres into the thread. Spin the thread up to create a rope.
This is easily done with a Petitjean Magic Tool, However, if you do not have one place two CdC feathers and a large partridge hackle together and stroke the fibres out from the stems.
Split the thread. This is best done with a sewing machine needle. Insert the fibres from one side of the three stacked feathers into the split. Pull down on your bobbin to close the split and hold the fibres. T View more...

Step 10
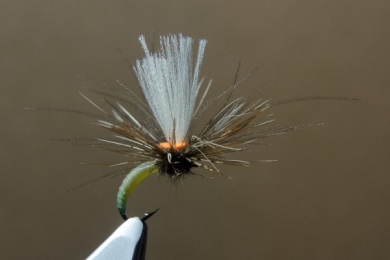
Wind the fibre rope around the wing post, above the thorax. The foam will ensure that the fibres stick out to form a "hackle".

Step 11
The whip finish goes around the wing post between hackle and thorax. You can, if you need to, reposition the hook in the vice to do this. It is possible though just to form the whip finish in a horizontal plane. How to do this is contained in my Generic Parachute Video

Step 12
Trim out the excess foam close to the hackle.
Step 13
The foam serves not only to help create the hackle but also flattens the wing into a blade. You may have o comb out the wing fibres a little to achieve this.
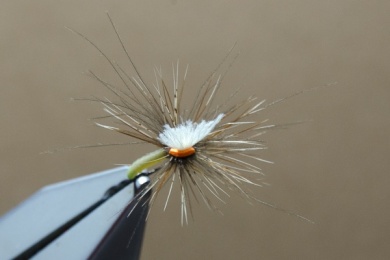
Step 14
Trim the wing to shape and you are ready to colour the abdomen.
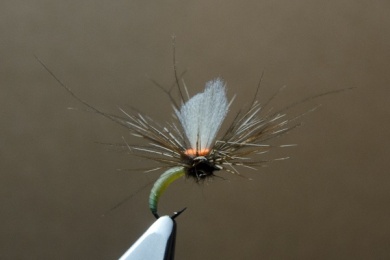
Step 15
Wipe with a marker pen working from the wing down the abdomen gives a result like this. Don’t go in the other direction or the ink will run around the turns of nymph skin uncontrollably. You may want to do this before dubbing the thorax, to avoid the danger of colouring the hackle. Alternatively you may wish to create a more segmented body by colouring the edge of the Nymph Skin before winding it. View more...
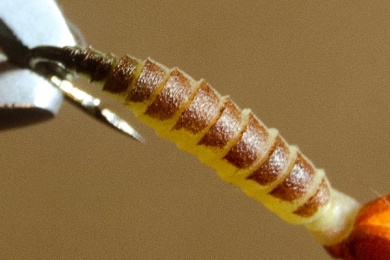
Step 16
In the example on the left I have coloured the edge of the Nymph Skin before winding the abdomen. Hold the nymph skin in a bulldog clip to do this.
